반응형

이번에는 RandomForestClassifier 모델로 학습해 보았다.


RandomForestClassifier는 앙상블 학습(Ensemble Learning) 기법 중 하나인 랜덤 포레스트(Random Forest)를 구현한 분류(Classification) 모델입니다. 
랜덤 포레스트는 여러 개의 의사결정 트리(Decision Tree)를 결합하여 강력한 예측 모델을 만드는 알고리즘입니다.

< 랜덤 포레스트 특징 >

앙상블 학습: 랜덤 포레스트는 여러 개의 의사결정 트리를 동시에 학습하고 이들의 예측 결과를 결합하여 최종 예측을 수행합니다. 이렇게 여러 개의 모델을 결합하는 앙상블 학습은 일반적으로 단일 모델보다 더욱 강력한 예측 성능을 제공합니다.
의사결정 트리: 랜덤 포레스트의 기본 모델로 사용되는 의사결정 트리는 데이터의 특성을 기반으로 하여 분류 작업을 수행하는 모델입니다. 의사결정 트리는 특정 기준에 따라 데이터를 분할하여 예측을 수행하는 방식으로 동작합니다.
랜덤성: 랜덤 포레스트는 의사결정 트리 학습 시에 랜덤성을 도입합니다. 이는 데이터의 일부 특성을 임의로 선택하거나 데이터를 부트스트랩 샘플링하는 등의 방법으로 랜덤성을 추가함으로써 모델의 다양성을 높입니다. 이는 과적합(Overfitting)을 방지하고 모델의 일반화 성능을 향상시킵니다.
랜덤 포레스트는 다양한 분야에서 활용되며, 데이터 분류, 패턴 인식, 텍스트 분석, 이미지 분류 등 다양한 문제에 적용될 수 있습니다. 또한, 특성 중요도를 제공하여 어떤 특성이 예측에 가장 중요한 역할을 하는지를 확인할 수도 있습니다.


//
//  MNIST - RANDOMFORESTCLASSIFIER
//
//  Created by netcanis on 2023/07/20.
//

import cv2
import os
import numpy as np
import pickle
import dataset_loader
import model_tester

from sklearn.model_selection import train_test_split
from sklearn.ensemble import RandomForestClassifier
from sklearn.svm import SVC


# Load MNIST data
training_images, training_labels, test_images, test_labels = dataset_loader.load_dataset("data/MNIST")

# Reshape the data
# 배열의 차원을 변경하여 크기를 자동으로 변경한다. (-1은 해당 차원의 크기를 자동으로 조정하라는 뜻)
training_images = np.reshape(training_images, (len(training_images), -1))
test_images = np.reshape(test_images, (len(test_images), -1))

# Print the image shapes
# reshape - Training Images shape: (60000, 784)
# reshape - Test Images shape: (10000, 784)
print("reshape - Training Images shape:", training_images.shape)
print("reshape - Test Images shape:", test_images.shape)
 
# Assign images and labels to x_train, y_train, x_test, y_test
x_train, y_train = training_images, training_labels
x_test, y_test = test_images, test_labels


#
# RandomForestClassifier 파일 저장.
#

# Train the model
model = RandomForestClassifier()
model.fit(x_train, y_train)

# Evaluate the model
score = model.score(x_test, y_test)
print('Accuracy:', score)

# Save the pkl model
with open("rfc_mnist_model.pkl", "wb") as file:
    pickle.dump(model, file)

print("Save the rfc_mnist_model.pkl.")


#
# TEST
#

model_file = "rfc_mnist_model.pkl"
model_tester.test_model("data/MNIST", model_file)

# Error rate: 3.09%


2023.07.19 - [AI] - MNIST 데이터셋 다운로드

2023.07.19 - [AI] - MNIST 데이터셋을 이미지 파일로 복원

2023.07.19 - [AI] - MNIST 데이터셋 로더

2023.07.19 - [AI] - MNIST 모델 테스터

2023.07.19 - [AI] - MINST - SVC(Support Vector Classifier)

2023.07.19 - [AI] - MNIST - RandomForestClassifier

2023.07.19 - [AI] - MNIST - Keras

2023.07.19 - [AI] - MNIST - TensorFlowLite


반응형

'개발 > AI,ML,ALGORITHM' 카테고리의 다른 글

MNIST - TensorFlowLite  (0) 2023.07.19
MNIST - Keras  (0) 2023.07.19
MINST - SVC(Support Vector Classifier)  (0) 2023.07.19
MNIST 모델 테스터  (0) 2023.07.19
MNIST 데이터셋 로더  (0) 2023.07.19
블로그 이미지

SKY STORY

,
반응형

MNIST 이미지 셋 파일들을 이용하여  SVC 모델로 학습을 시켜보았다.

SVC(Support Vector Classifier)는 SVM(Support Vector Machine) 알고리즘을 기반으로 한 분류(Classification) 모델입니다. 
서포트 벡터 머신은 지도 학습(Supervised Learning)에서 주로 사용되며, 데이터를 분류하는 경계를 찾는 데에 특화되어 있습니다.

< SVC 특징 >

최대 마진 분류: SVC는 데이터를 분류하는 결정 경계를 찾을 때, 가능한 한 최대 마진(Margin)을 가지도록 합니다. 
마진은 결정 경계와 가장 가까운 데이터 샘플들 간의 거리를 의미하며, 이를 최대화함으로써 일반화 성능을 향상시킬 수 있습니다.
커널 기법: SVC는 비선형적인 데이터를 처리하기 위해 커널(Kernel) 기법을 사용합니다. 
커널은 데이터를 고차원 특징 공간으로 매핑하여 선형적으로 분리할 수 있도록 합니다. 
대표적인 커널 함수로는 선형 커널, 다항식 커널, 가우시안(RBF) 커널 등이 있습니다.
서포트 벡터: SVC는 분류 결정 경계에 가장 가까이 위치한 데이터 샘플들을 서포트 벡터(Support Vector)라고 부릅니다. 
이들 데이터 샘플들은 분류 결정에 영향을 미치는 주요한 역할을 합니다. 
SVC는 이 서포트 벡터들을 효율적으로 찾아내어 분류를 수행합니다.
SVC는 이진 분류(Binary Classification)와 다중 클래스 분류(Multi-Class Classification) 문제에 모두 사용될 수 있습니다. 
또한, SVM은 분류 뿐만 아니라 회귀(Regression), 이상치 탐지(Outlier Detection), 
차원 축소(Dimensionality Reduction) 등 다양한 문제에도 적용될 수 있습니다.

//
//  MINST - SVC(SUPPORT VECTOR CLASSIFIER)
//
//  Created by netcanis on 2023/07/20.
//

import numpy as np
import pickle
import dataset_loader
import model_tester

from sklearn.model_selection import train_test_split
from sklearn.svm import SVC


# Load MNIST data
training_images, training_labels, test_images, test_labels = dataset_loader.load_dataset("data/MNIST")

# Reshape the data
# 배열의 차원을 변경하여 크기를 자동으로 변경한다. (-1은 해당 차원의 크기를 자동으로 조정하라는 뜻)
training_images = np.reshape(training_images, (len(training_images), -1))
test_images = np.reshape(test_images, (len(test_images), -1))

# Print the image shapes
# reshape - Training Images shape: (60000, 784)
# reshape - Test Images shape: (10000, 784)
print("reshape - Training Images shape:", training_images.shape)
print("reshape - Test Images shape:", test_images.shape)
 
# Assign images and labels to x_train, y_train, x_test, y_test
x_train, y_train = training_images, training_labels
x_test, y_test = test_images, test_labels


#
# SVC(Support Vector Classifier) 파일 저장.
#

print("Training in progress... Please wait.")

# Train the model
# 'verbose=True'를 설정하여 진행상태 로그 출력.
model = SVC(verbose=True)
model.fit(x_train, y_train)

# Evaluate the model
score = model.score(x_test, y_test)
print('Accuracy:', score)

# Save the model (Support Vector Machines)
with open("svm_mnist_model.pkl", "wb") as file:
    pickle.dump(model, file)
    
print("Save the vm_mnist_model.pkl.")


#
# TEST
#

model_file = "svm_mnist_model.pkl"
model_tester.test_model("data/MNIST", model_file)

# Error rate: 2.08%


2023.07.19 - [AI] - MNIST 데이터셋 다운로드

2023.07.19 - [AI] - MNIST 데이터셋을 이미지 파일로 복원

2023.07.19 - [AI] - MNIST 데이터셋 로더

2023.07.19 - [AI] - MNIST 모델 테스터

2023.07.19 - [AI] - MINST - SVC(Support Vector Classifier)

2023.07.19 - [AI] - MNIST - RandomForestClassifier

2023.07.19 - [AI] - MNIST - Keras

2023.07.19 - [AI] - MNIST - TensorFlowLite


반응형

'개발 > AI,ML,ALGORITHM' 카테고리의 다른 글

MNIST - Keras  (0) 2023.07.19
MNIST - RandomForestClassifier  (0) 2023.07.19
MNIST 모델 테스터  (0) 2023.07.19
MNIST 데이터셋 로더  (0) 2023.07.19
MNIST 데이터셋을 이미지 파일로 복원  (0) 2023.07.19
블로그 이미지

SKY STORY

,
반응형

MNIST 모델을 머신러닝을 통해 학습하여 모델 파일을

저장하게 되는데 이 모델파일에 대한 테스트를 진행 하고자

테스터 함수를 만들게 되었다.

이 함수는 test_set 폴더에 있는 이미지들을 이용하여

테스트를 진행하고  error rate를 계산하여 출력해 보았다.


//
//  MNIST 모델 테스터
//
//  Created by netcanis on 2023/07/20.
//

import cv2
import os
import numpy as np
import pickle
import tensorflow as tf
from keras.models import load_model


def test_model(path, model_file):
    print("Testing in progress...")
    
    # 데이터셋 경로
    test_set_path = os.path.join(path, 'test_set')
    
    total_samples = 0
    error_count = 0
    
    # Load the model from file
    with open(model_file, "rb") as file:
        if model_file.endswith('.h5'):
            loaded_model = load_model(model_file)
        elif model_file.endswith('.tflite'):
            interpreter = tf.lite.Interpreter(model_path = model_file)
            interpreter.allocate_tensors()
            # Get the input and output details
            input_details = interpreter.get_input_details()
            output_details = interpreter.get_output_details()
        else:
            loaded_model = pickle.load(file)
        
        
    # Load the images from the test set
    for digit_folder in os.listdir(test_set_path):
        if os.path.isdir(os.path.join(test_set_path, digit_folder)):
            label = int(digit_folder)
            for index, image_file in enumerate(os.listdir(os.path.join(test_set_path, digit_folder))):
                if image_file.endswith('.png') or image_file.endswith('.jpg'):

                    image = cv2.imread(os.path.join(test_set_path, digit_folder, image_file))
                    if path.endswith('/credit_card'):
                        image = cv2.resize(image, (32, 32))
                    else: # '/MNIST'
                        image = cv2.resize(image, (28, 28))

                    # Convert color image to grayscale if necessary
                    if image.shape[2] > 1:
                        image = cv2.cvtColor(image, cv2.COLOR_BGR2GRAY)
                            
                    if model_file.endswith('.h5'):
                        image = image.reshape(1, 28, 28, 1) # 배열을 4차원으로 변경.
                        image = image / 255.0
                        # Predict the label for the image
                        predicted_label = loaded_model.predict(image)
                        # Get the predicted class
                        predicted_class = np.argmax(predicted_label)
                    elif model_file.endswith('.tflite'):
                        image = np.expand_dims(image, axis=0)  # Add batch dimension
                        image = np.expand_dims(image, axis=3)  # Add channel dimension
                        image = image.astype(np.float32) / 255.0
                        # Set the input tensor
                        interpreter.set_tensor(input_details[0]['index'], image)
                        # Run the inference
                        interpreter.invoke()
                        # Get the output tensor
                        output_tensor = interpreter.get_tensor(output_details[0]['index'])
                        # Get the predicted class
                        predicted_class = np.argmax(output_tensor)
                    else: # SVM, RandomForestClassifier ('.pkl')                       
                        # Reshape the data
                        image = image.reshape(1, -1)
                        # Predict the label for the image
                        predicted_label = loaded_model.predict(image)
                        # Get the predicted class
                        predicted_class = predicted_label[0]
                    
                    # error 
                    if predicted_class != label:
                        error_count += 1
                        print(f"Prediction for {index} - {label}: {predicted_class}")
                    
                    total_samples += 1


    # Print error rate
    error_rate = (error_count / total_samples) * 100
    print(f"Error rate: {error_rate:.2f}%")


사용 방법은 다음과 같다.

import mnist_model_tester

model_file = "svm_mnist_model.pkl"
mnist_model_tester.test_mnist_model("data/MNIST", model_file)

or

from mnist_model_tester import test_mnist_model

model_file = "svm_mnist_model.pkl"
test_mnist_model("data/MNIST", model_file)


2023.07.19 - [AI] - MNIST 데이터셋 다운로드

2023.07.19 - [AI] - MNIST 데이터셋을 이미지 파일로 복원

2023.07.19 - [AI] - MNIST 데이터셋 로더

2023.07.19 - [AI] - MNIST 모델 테스터

2023.07.19 - [AI] - MINST - SVC(Support Vector Classifier)

2023.07.19 - [AI] - MNIST - RandomForestClassifier

2023.07.19 - [AI] - MNIST - Keras

2023.07.19 - [AI] - MNIST - TensorFlowLite


반응형

'개발 > AI,ML,ALGORITHM' 카테고리의 다른 글

MNIST - RandomForestClassifier  (0) 2023.07.19
MINST - SVC(Support Vector Classifier)  (0) 2023.07.19
MNIST 데이터셋 로더  (0) 2023.07.19
MNIST 데이터셋을 이미지 파일로 복원  (0) 2023.07.19
MNIST 데이터셋 다운로드  (0) 2023.07.19
블로그 이미지

SKY STORY

,
반응형

이후 구현할 머신러닝 모델 구현을 위해 데이터 셋 로더 함수를 만들어 보았다.
이 함수는 데이터 셋 이미지들(트레이닝, 테스트)을 로딩하여 이미지, 라벨(해당 이미지 숫자) 리스트를 반환하도록 만들어 보았다.

//
//  MNIST 데이터셋 로더
//
//  Created by netcanis on 2023/07/20.
//


import cv2
import os
import numpy as np

#='data/MNIST'
def load_dataset(path):
    # 데이터셋 경로
    training_set_path = os.path.join(path, 'training_set')
    test_set_path = os.path.join(path, 'test_set')
    
    # Load the images from the training set
    training_images = []
    training_labels = []
    for digit_folder in os.listdir(training_set_path):
        if os.path.isdir(os.path.join(training_set_path, digit_folder)):
            label = int(digit_folder)
            for index, image_file in enumerate(os.listdir(os.path.join(training_set_path, digit_folder))):
                if image_file.endswith('.png') or image_file.endswith('.jpg'):
                    image = cv2.imread(os.path.join(training_set_path, digit_folder, image_file))
                    image = cv2.resize(image, (28, 28))

                    # Convert color image to grayscale if necessary
                    if image.shape[2] > 1:
                        image = cv2.cvtColor(image, cv2.COLOR_BGR2GRAY)

                    # Print image path
                    print(str(index).zfill(5) + " " + os.path.join(training_set_path, digit_folder, image_file))

                    training_images.append(image)
                    training_labels.append(label)

    # Load the images from the test set
    test_images = []
    test_labels = []
    for digit_folder in os.listdir(test_set_path):
        if os.path.isdir(os.path.join(test_set_path, digit_folder)):
            label = int(digit_folder)
            for index, image_file in enumerate(os.listdir(os.path.join(test_set_path, digit_folder))):
                if image_file.endswith('.png') or image_file.endswith('.jpg'):
                    image = cv2.imread(os.path.join(test_set_path, digit_folder, image_file))
                    image = cv2.resize(image, (28, 28))

                    # Convert color image to grayscale if necessary
                    if image.shape[2] > 1:
                        image = cv2.cvtColor(image, cv2.COLOR_BGR2GRAY)

                    # Print image path
                    print(str(index).zfill(5) + " " + os.path.join(test_set_path, digit_folder, image_file))

                    test_images.append(image)
                    test_labels.append(label)

    # Convert lists to numpy arrays
    training_images = np.array(training_images)
    training_labels = np.array(training_labels)
    test_images = np.array(test_images)
    test_labels = np.array(test_labels)

    # Print the image shapes
    # Training Images shape: (60000, 28, 28) or (20000, 32, 32)
    # Test Images shape: (10000, 28, 28) or (4000, 32, 32)
    print("Training Images shape:", training_images.shape)
    print("Test Images shape:", test_images.shape)

    return training_images, training_labels, test_images, test_labels


2023.07.19 - [AI] - MNIST 데이터셋 다운로드

2023.07.19 - [AI] - MNIST 데이터셋을 이미지 파일로 복원

2023.07.19 - [AI] - MNIST 데이터셋 로더

2023.07.19 - [AI] - MNIST 모델 테스터

2023.07.19 - [AI] - MINST - SVC(Support Vector Classifier)

2023.07.19 - [AI] - MNIST - RandomForestClassifier

2023.07.19 - [AI] - MNIST - Keras

2023.07.19 - [AI] - MNIST - TensorFlowLite


반응형

'개발 > AI,ML,ALGORITHM' 카테고리의 다른 글

MINST - SVC(Support Vector Classifier)  (0) 2023.07.19
MNIST 모델 테스터  (0) 2023.07.19
MNIST 데이터셋을 이미지 파일로 복원  (0) 2023.07.19
MNIST 데이터셋 다운로드  (0) 2023.07.19
Neural Network (XOR)  (0) 2022.11.18
블로그 이미지

SKY STORY

,
반응형

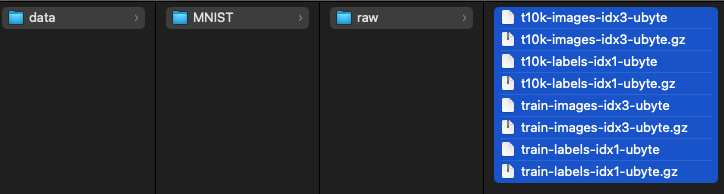
data/MNIST/row/ 폴더에 다운로드된 데이터셋 정보를 이용하여 image파일로 복원하고 해당 숫자(0-9)별로 폴더를 생성하고 각 숫자에 맞게 폴더내에 저장하도록 구현해 보았다.
labels.txt에는 각각의 이미지에대한 숫자 값을 기록하였다.

//
//  MNIST 데이터셋을 이미지 파일로 복원
//
//  Created by netcanis on 2023/07/20.
//

import matplotlib.pyplot as plt
import gzip
import numpy as np
import os


# 파일 압축 해제 함수 
def decompress_file(compressed_file, decompressed_file):
    with gzip.open(compressed_file, 'rb') as f_in, open(decompressed_file, 'wb') as f_out:
        f_out.write(f_in.read())


'''
================= training_set =================
'''

# 이미지 개수 및 크기 추출
training_num_images = 60000  # 예시로는 60,000개의 이미지가 있는 것으로 가정
image_size = 28  # 이미지 크기는 28x28 픽셀

# 압축 해제할 파일 경로 (training_set)
training_image_compressed_file = 'data/MNIST/raw/train-images-idx3-ubyte.gz'
training_label_compressed_file = 'data/MNIST/raw/train-labels-idx1-ubyte.gz'

# 압축 해제된 파일 경로 (training_set)
training_image_decompressed_file = 'data/MNIST/raw/train-images-idx3-ubyte'
training_label_decompressed_file = 'data/MNIST/raw/train-labels-idx1-ubyte'


# 이미지 저장 폴더 경로
training_set_folder = 'data/MNIST/training_set'

# 라벨 저장 파일 경로
training_label_file = 'data/MNIST/training_set/labels.txt'


# 이미지 파일 압축 해제 (training_set)
decompress_file(training_image_compressed_file, training_image_decompressed_file)

# 라벨 파일 압축 해제 (training_set)
decompress_file(training_label_compressed_file, training_label_decompressed_file)


# 이미지 저장 폴더 생성 (training_set)
if not os.path.exists(training_set_folder):
    os.makedirs(training_set_folder)


# 라벨 데이터를 numpy 배열로 변환 (training_set)
with open(training_label_decompressed_file, 'rb') as f:
    # 헤더 부분은 건너뛰기
    f.read(8)
    # 라벨 데이터 읽기
    buf = f.read()

# 라벨 배열 형태로 변환 (training_set)
training_labels = np.frombuffer(buf, dtype=np.uint8)


# 라벨 저장 파일 열기 (training_set)
with open(training_label_file, 'w') as f:
    # 이미지에 대한 라벨 값을 순차적으로 저장
    for i in range(training_num_images):
        image_path = f'{training_set_folder}/{training_labels[i]}/image_{i}.png'  # 이미지 파일 경로  (image_{i:05}.png)
        label_value = training_labels[i]  # 라벨 값

        # 이미지 파일 경로와 라벨 값을 파일에 저장
        f.write(f'{image_path}\t{label_value}\n')


# 이미지 데이터를 numpy 배열로 변환 (training_set)
with open(training_image_decompressed_file, 'rb') as f:
    # 헤더 부분은 건너뛰기
    f.read(16)
    # 이미지 데이터 읽기
    buf = f.read()

# 이미지 배열 형태로 변환
training_images = np.frombuffer(buf, dtype=np.uint8).reshape(training_num_images, image_size, image_size)


# 이미지를 순서대로 저장 (training_set)
for i, image in enumerate(training_images):
    label_value = training_labels[i]  # 라벨 값
    
    # 해당 숫자의 폴더 생성
    digit_folder = os.path.join(training_set_folder, str(label_value))
    if not os.path.exists(digit_folder):
        os.makedirs(digit_folder)

     # 이미지 파일 경로
    image_path = os.path.join(digit_folder, f'image_{i}.png')
    plt.imsave(image_path, image, cmap='gray')


'''
================= test_set =================
'''

# 이미지 개수 및 크기 추출
test_num_images = 10000  # 예시로는 60,000개의 이미지가 있는 것으로 가정
test_image_size = 28  # 이미지 크기는 28x28 픽셀

# 이미지 저장 폴더 경로
test_set_folder = 'data/MNIST/test_set'

# 라벨 저장 파일 경로
test_label_file = 'data/MNIST/test_set/labels.txt'

# 압축 해제할 파일 경로 (test_set)
test_image_compressed_file = 'data/MNIST/raw/t10k-images-idx3-ubyte.gz'
test_label_compressed_file = 'data/MNIST/raw/t10k-labels-idx1-ubyte.gz'

# 압축 해제된 파일 경로 (test_set)
test_image_decompressed_file = 'data/MNIST/raw/t10k-images-idx3-ubyte'
test_label_decompressed_file = 'data/MNIST/raw/t10k-labels-idx1-ubyte'


# 이미지 파일 압축 해제 (test_set)
decompress_file(test_image_compressed_file, test_image_decompressed_file)

# 라벨 파일 압축 해제 (test_set)
decompress_file(test_label_compressed_file, test_label_decompressed_file)


# 이미지 저장 폴더 생성 (test_set)
if not os.path.exists(test_set_folder):
    os.makedirs(test_set_folder)


# 라벨 데이터를 numpy 배열로 변환 (test_set)
with open(test_label_decompressed_file, 'rb') as f:
    # 헤더 부분은 건너뛰기
    f.read(8)
    # 라벨 데이터 읽기
    buf = f.read()

# 라벨 배열 형태로 변환 (test_set)
test_labels = np.frombuffer(buf, dtype=np.uint8)


# 라벨 저장 파일 열기 (test_set)
with open(test_label_file, 'w') as f:
    # 이미지에 대한 라벨 값을 순차적으로 저장
    for i in range(test_num_images):
        image_path = f'{test_set_folder}/{test_labels[i]}/image_{i}.png'  # 이미지 파일 경로  (image_{i:05}.png)
        label_value = test_labels[i]  # 라벨 값

        # 이미지 파일 경로와 라벨 값을 파일에 저장
        f.write(f'{image_path}\t{label_value}\n')


# 이미지 데이터를 numpy 배열로 변환 (test_set)
with open(test_image_decompressed_file, 'rb') as f:
    # 헤더 부분은 건너뛰기
    f.read(16)
    # 이미지 데이터 읽기
    buf = f.read()

# 이미지 배열 형태로 변환
test_images = np.frombuffer(buf, dtype=np.uint8).reshape(test_num_images, image_size, image_size)


# 이미지를 순서대로 저장 (test_set)
for i, image in enumerate(test_images):
    label_value = test_labels[i]  # 라벨 값
    
    # 해당 숫자의 폴더 생성
    digit_folder = os.path.join(test_set_folder, str(label_value))
    if not os.path.exists(digit_folder):
        os.makedirs(digit_folder)

     # 이미지 파일 경로
    image_path = os.path.join(digit_folder, f'image_{i}.png')
    plt.imsave(image_path, image, cmap='gray')

 
실행 결과는 다음과 같다.

 
2023.07.19 - [AI] - MNIST 데이터셋 다운로드

2023.07.19 - [AI] - MNIST 데이터셋을 이미지 파일로 복원

2023.07.19 - [AI] - MNIST 데이터셋 로더

2023.07.19 - [AI] - MNIST 모델 테스터

2023.07.19 - [AI] - MINST - SVC(Support Vector Classifier)

2023.07.19 - [AI] - MNIST - RandomForestClassifier

2023.07.19 - [AI] - MNIST - Keras

2023.07.19 - [AI] - MNIST - TensorFlowLite


반응형

'개발 > AI,ML,ALGORITHM' 카테고리의 다른 글

MNIST 모델 테스터  (0) 2023.07.19
MNIST 데이터셋 로더  (0) 2023.07.19
MNIST 데이터셋 다운로드  (0) 2023.07.19
Neural Network (XOR)  (0) 2022.11.18
2D 충돌처리  (0) 2020.12.12
블로그 이미지

SKY STORY

,
반응형

문자인식을 학습을 위해 MNIST 데이터셋을 다운로드 받아 

'data'폴더에 저장하는 코드이다.

//
//  MNIST 데이터셋 다운로드
//
//  Created by netcanis on 2023/07/20.
//

import torch
from torchvision import datasets, transforms

# MNIST 데이터셋 다운로드
transform = transforms.Compose([
    transforms.ToTensor(),
    transforms.Normalize((0.5,), (0.5,))
])
train_dataset = datasets.MNIST(root='./data', train=True, download=True, transform=transform)
test_dataset = datasets.MNIST(root='./data', train=False, download=True, transform=transform)


저장 결과는 다음과 같다.


2023.07.19 - [AI] - MNIST 데이터셋 다운로드

2023.07.19 - [AI] - MNIST 데이터셋을 이미지 파일로 복원

2023.07.19 - [AI] - MNIST 데이터셋 로더

2023.07.19 - [AI] - MNIST 모델 테스터

2023.07.19 - [AI] - MINST - SVC(Support Vector Classifier)

2023.07.19 - [AI] - MNIST - RandomForestClassifier

2023.07.19 - [AI] - MNIST - Keras

2023.07.19 - [AI] - MNIST - TensorFlowLite


반응형

'개발 > AI,ML,ALGORITHM' 카테고리의 다른 글

MNIST 데이터셋 로더  (0) 2023.07.19
MNIST 데이터셋을 이미지 파일로 복원  (0) 2023.07.19
Neural Network (XOR)  (0) 2022.11.18
2D 충돌처리  (0) 2020.12.12
Generic algorithm  (0) 2020.05.19
블로그 이미지

SKY STORY

,
반응형

python에서 신경망 xor 연산 학습 샘플을 만들어 보았다.

# neural network xor


import math
import random
from datetime import datetime

import matplotlib.pyplot as plt
import numpy as np

# 네트워크의 학습 속도
LEARNING_RATE = 1.414213562

MOMENTUM = 0.25

# 훈련 데이타
TRAINING_DATA = [
    [1.0, 0.0],
    [1.0, 1.0],
    [0.0, 1.0],
    [0.0, 0.0]
]

# 타겟 값
TARGET_DATA = [
    1.0, 
    0.0, 
    1.0, 
    0.0
]

MAX_LAYERS = 4
MAX_WEIGHTS = 9
MAX_EPOCHS = 10000 

# 가중치
weights = [0. for i in range(MAX_WEIGHTS)] # [0] * 9
gradients = [0. for i in range(MAX_WEIGHTS)] # [0] * 9
error = [0. for i in range(MAX_LAYERS)] # [0] * 4  #error = np.zeros(4, dtype='f')

update_weights = [0. for i in range(MAX_WEIGHTS)] # [0] * 9
prev_weight_update = [0. for i in range(MAX_WEIGHTS)] # [0] * 9
rmse_array_error = [0. for i in range(MAX_EPOCHS)] # [0] * 10000  # 각 세대별 RMSE 에러 값

bias1 = 1.0
bias2 = 1.0
bias3 = 1.0
h1 = 0.0
h2 = 0.0
output_neuron = 0.0
derivative_O1 = 0.0
derivative_h1 = 0.0
derivative_h2 = 0.0
sum_output = 0.0
sum_h1 = 0.0
sum_h2 = 0.0


# sum_output
graph_sum_output = [[0. for i in range(MAX_EPOCHS)] for j in range(MAX_LAYERS)]

# 그래프 출력을 위한 버퍼 
graph_derivative_O1 = [[0. for i in range(MAX_EPOCHS)] for j in range(MAX_LAYERS)]
graph_derivative_h1 = [[0. for i in range(MAX_EPOCHS)] for j in range(MAX_LAYERS)]
graph_derivative_h2 = [[0. for i in range(MAX_EPOCHS)] for j in range(MAX_LAYERS)]


'''
                bias1   bias3
                  |      |
                  w4     w8
                  |      |
 input1 --w0 --- h1      |
        \       /  \     |
         \     /    w6   |
          w1  /      \   |
            \/         output
            /\        /
          w2  \      w7
          /    \    /
         /      \  /
 input2 --w3----- h2
                  |
                  w5
                  |
                bias2
'''


def sigmoid_function(x) :
    sigmoid = 1.0 / ( 1.0 + np.exp(-x) )
    return sigmoid

# 변수 초기화 
def initialize():
    global prev_weight_update, update_weights, gradients, error, rmse_array_error
    for i in range(MAX_WEIGHTS):
        prev_weight_update[i] = 0.0
        update_weights[i] = 0.0
        gradients[i] = 0.0
    for i in range(MAX_LAYERS):
        error[i] = 0.0
    for i in range(MAX_EPOCHS):
        rmse_array_error[i] = 0.0

def generate_weights() :
    global weights
    for i in range(MAX_WEIGHTS):
        weights[i] = random.uniform(-1.0, 1.0)
        print("weight[",i,"] = ", weights[i])

def train_neural_net() :
    global rmse_array_error, error
    # 세대(학습 횟수)
    epoch = 0
    while epoch < MAX_EPOCHS :
        for i in range(MAX_LAYERS):
            calc_hidden_layers(i)
            calc_output_neuron()
            graph_sum_output[i][epoch] = sum_output
            calc_error(i)
            calc_derivatives(i)
            graph_derivative_O1[i][epoch] = derivative_O1
            graph_derivative_h1[i][epoch] = derivative_h1
            graph_derivative_h2[i][epoch] = derivative_h2
            calc_gradients(i)
            calc_updates()

        # RMSE 에러 값
        sum = math.pow(error[0], 2) + math.pow(error[1], 2) + math.pow(error[2], 2) + math.pow(error[3], 2)
        rmse_error = math.sqrt( sum / MAX_LAYERS )
        print("RMSE error: ", rmse_error)
        rmse_array_error[epoch] = rmse_error

        # 세대        
        epoch = epoch + 1
        print("epoch:", epoch)

        
        # 예외 처리 - 처음부터 다시 
        if epoch > 4000 and rmse_error > 0.3:
            epoch = 0
            initialize()
            generate_weights()


def calc_hidden_layers(x):
    global sum_h1, sum_h2, h1, h2, weights, bias1, bias2
    sum_h1 = (TRAINING_DATA[x][0] * weights[0]) + (TRAINING_DATA[x][1] * weights[2]) + (bias1 * weights[4])
    sum_h2 = (TRAINING_DATA[x][0] * weights[1]) + (TRAINING_DATA[x][1] * weights[3]) + (bias2 * weights[5])
    h1 = sigmoid_function(sum_h1)
    h2 = sigmoid_function(sum_h2)

def calc_output_neuron():
    global sum_output, h1, h2, weights, bias3, output_neuron
    sum_output = (h1 * weights[6]) + (h2 * weights[7]) + (bias3 * weights[8])
    output_neuron = sigmoid_function(sum_output)

def calc_error(x):
    global error, output_neuron
    error[x] = output_neuron - TARGET_DATA[x]

def calc_derivatives(x):
    global derivative_O1, derivative_h1, derivative_h2, sum_h1, sum_h2, weights, sum_output, error
    derivative_O1 = -error[x] * ( np.exp(sum_output) / math.pow((1 + np.exp(sum_output)), 2) )
    derivative_h1 = ( np.exp(sum_h1) / math.pow((1 + np.exp(sum_h1)), 2) ) * weights[6] * derivative_O1
    derivative_h2 = ( np.exp(sum_h2) / math.pow((1 + np.exp(sum_h2)), 2) ) * weights[7] * derivative_O1

def calc_gradients(x):
    global gradients, derivative_O1, derivative_h1, derivative_h2, h1, h2, bias1, bias2,bias3
    gradients[0] = sigmoid_function(TRAINING_DATA[x][0]) * derivative_h1
    gradients[1] = sigmoid_function(TRAINING_DATA[x][0]) * derivative_h2
    gradients[2] = sigmoid_function(TRAINING_DATA[x][1]) * derivative_h1
    gradients[3] = sigmoid_function(TRAINING_DATA[x][1]) * derivative_h2
    gradients[4] = sigmoid_function(bias1) * derivative_h1
    gradients[5] = sigmoid_function(bias2) * derivative_h2
    gradients[6] = h1 * derivative_O1
    gradients[7] = h2 * derivative_O1
    gradients[8] = sigmoid_function(bias3) * derivative_O1

def calc_updates():
    global update_weights, gradients, prev_weight_update
    for i in range(MAX_WEIGHTS):
        update_weights[i] = (LEARNING_RATE * gradients[i]) + (MOMENTUM * prev_weight_update[i])
        prev_weight_update[i] = update_weights[i]
        weights[i] = weights[i] + update_weights[i]


def save_data():
    global rmse_array_error, weights
    with open('errorData1.txt', 'w', encoding='utf-8') as f:
        for i in range(MAX_EPOCHS):
            line = '%d   %s' % (i, rmse_array_error[i])
            f.write(line) # f.write('\n'.join(lines))
            f.write('\n') # f.writelines('\n')
    
    with open('weight_data1.txt', 'w', encoding='utf-8') as f:
        for i in range(MAX_WEIGHTS):
            line = '%d   %s' % (i, weights[i])
            f.write(line)
            f.write('\n')

def start_input():
    global weights, sum_h1, sum_h2, h1, h2, bias1, bias2, bias3, sum_output, output_neuron

    choice = 'y'
    while True:
        if choice == 'Y' or choice == 'y':
            data1 = input("enter data 1: ")
            if data1.isnumeric() == False :
                continue
            data2 = input("enter data 2: ")
            if data2.isnumeric() == False :
                continue

            sum_h1 = (float(data1) * weights[0]) + (float(data2) * weights[2]) + (bias1 * weights[4])
            sum_h2 = (float(data1) * weights[1]) + (float(data2) * weights[3]) + (bias2 * weights[5])
            h1 = sigmoid_function(sum_h1)
            h2 = sigmoid_function(sum_h2)
            
            sum_output = (h1 * weights[6]) + (h2 * weights[7]) + (bias3 * weights[8])
            output_neuron = sigmoid_function(sum_output)
            print('output = ', output_neuron)

            choice = input('Again? (y/n) : ')
        else:
            print('exit')
            break


initialize()
generate_weights()
train_neural_net()

save_data()
start_input()


# ===============================================================

# sigmoid
x = np.arange( -10.0, 10.0, 0.1)
y = 1.0 / (1.0 + np.exp(-x))
plt.subplot(2, 3, 1)                
plt.plot(x,y, 'r-')#plt.plot(x1, y1, 'r--', x2, y2, 'bs', x3, y3, 'g^')
plt.title('sigmoid')# 1.0 / (1.0 + np.exp(-x))
plt.axis([-10.0, 10.0, 0, 1.0])# xmin, xmax, ymin, ymax
plt.xlabel('x')
plt.ylabel('y')

# sum_output
x2 = np.arange( 0.0, 10000.0, 1.0)
y2 = graph_sum_output[0]
plt.subplot(2, 3, 2)               
plt.plot(x2,y2, 'r-')#plt.plot(x1, y1, 'r--', x2, y2, 'bs', x3, y3, 'g^')
plt.title('sum_output')
plt.axis([0.0, 10000.0, -0.2, 5.0])# xmin, xmax, ymin, ymax
plt.xlabel('epoch')
plt.ylabel('sum_output')

# rmse_array_error
x2 = np.arange( 0.0, 10000.0, 1.0)
y2 = rmse_array_error
plt.subplot(2, 3, 3)               
plt.plot(x2,y2, 'r-')#plt.plot(x1, y1, 'r--', x2, y2, 'bs', x3, y3, 'g^')
plt.title('RMSE Error')
plt.axis([0.0, 10000.0, 0.0, 1.0])# xmin, xmax, ymin, ymax
plt.xlabel('epoch')
plt.ylabel('RMSE error')


# derivative_O1
x3 = np.arange( 0.0, 10000.0, 1.0)
y3 = graph_derivative_O1[0] 
plt.subplot(2, 3, 4)              
plt.plot(x3,y3, 'r-')#plt.plot(x1, y1, 'r--', x2, y2, 'bs', x3, y3, 'g^')
plt.title('derivative_O1')
plt.axis([0.0, 10000.0, -0.05, 0.15])# xmin, xmax, ymin, ymax
plt.xlabel('epoch')
plt.ylabel('derivative_O1')

# derivative_h1
x4 = np.arange( 0.0, 10000.0, 1.0)
y4 = graph_derivative_h1[0]
plt.subplot(2, 3, 5)                
plt.plot(x4,y4, 'r-')#plt.plot(x1, y1, 'r--', x2, y2, 'bs', x3, y3, 'g^')
plt.title('derivative_h1')
plt.axis([0.0, 10000.0, -0.05, 0.15])# xmin, xmax, ymin, ymax
plt.xlabel('epoch')
plt.ylabel('derivative_h1')

# derivative_h2
x5 = np.arange( 0.0, 10000.0, 1.0)
y5 = graph_derivative_h2[0]
plt.subplot(2, 3, 6)                
plt.plot(x5,y5, 'r-')#plt.plot(x1, y1, 'r--', x2, y2, 'bs', x3, y3, 'g^')
plt.title('derivative_h2')
plt.axis([0.0, 10000.0, -0.05,0.15])# xmin, xmax, ymin, ymax
plt.xlabel('epoch')
plt.ylabel('derivative_h2')


fig1 = plt.gcf()
plt.tight_layout()
plt.show()
plt.draw()
fig1.savefig('nn_xor_derivative.png', dpi=200, facecolor='#eeeeee', edgecolor='blue')


결과 그래프는 다음과 같다.


#----------------------------------------------------------------
weight_data1.txt

0 -4.749828824761969
1 -3.5287652884908254
2 -4.747508485076842
3 -3.5276048615858935
4 1.816578868741784
5 5.375092217625854
6 -13.742230835984616
7 13.712746773928748
8 -6.530714643755955


#----------------------------------------------------------------
errorData1.txt

0 0.5424391889837473
1 0.5331220459189032
2 0.5304319567906218

10 0.5274519675428608

100 0.5198658296518869

200 0.5155776076419263

300 0.5046587144670703

400 0.4791696883760997

1000 0.09849463249517668

2000 0.03296842320700676

3000 0.02307589090605272

9999 0.010292985691909057


반응형

'개발 > AI,ML,ALGORITHM' 카테고리의 다른 글

MNIST 데이터셋을 이미지 파일로 복원  (0) 2023.07.19
MNIST 데이터셋 다운로드  (0) 2023.07.19
2D 충돌처리  (0) 2020.12.12
Generic algorithm  (0) 2020.05.19
neural network  (0) 2020.05.19
블로그 이미지

SKY STORY

,
반응형

2D 충돌처리

(1) 선과

 -  Line 직선의 방정식을 구함.          
    P = P1 + u(P2 - P1), P' = P3 + v(P4 - P3)

    교차하는 점에선 P == P'이므로,              
    P1 + u(P2 - P1) = P3 + v(P4 - P3)

    각각 x y 대해 정리                          
    x1 + u(x2 - x1) = x3 + v(x4 - x3)
    y1 + u(y2 - y1) = y3 + v(y4 - y3)

    두 식을 이용해, u v 대해 풀어낸다.  
    u = ((x4-x3)*(y1-y3)-(y4-y3)*(x1-x3)) / ((x2-x1)*(y4-y3)-(x4-x3)*(y2-y1))
    v = ((x2-x1)*(y1-y3)-(y2-y1)*(x1-x3)) / ((x2-x1)*(y4-y3)-(x4-x3)*(y2-y1))

    두 선의 각각의 좌표를 이용해 u v 값을 구할 있음.
    이 u v 0이면 수평, 0 < u < 1이고 0 < v < 1이면 교점이 있는 것임. u v 1보다 크면, 만나지 않는 것임.
구한 u v 직선의 방정식에 대입하면교점의 좌표도 구할 있음.


(2) 선과 사각형

 - 사각형의 선분에 대해 선과 충돌을 검사.

float inputRotation = MathHelper.ToRadians(degree);
Rectangle destRect = new Rectangle(200, 200, 200, 200);
Vector2 vOrg = new Vector2(1, 0);

vOrg = Vector2.Transform(vOrg, Matrix.CreateRotationZ(inputRotation));
  
BoundingBox box = new BoundingBox(new Vector3(destRect.Left, destRect.Top, 0.0f),
                                  new Vector3(destRect.Right, destRect.Bottom, 0.0f));
Ray ray = new Ray(new Vector3(vStart, 0.0f), new Vector3(vOrg, 0.0f));

float? result = box.Intersects(ray);

if (result != null && result <= lineLength)
{

   // 충돌

}


3D에서 충돌을 감지하는 BoundingBox Ray 2D에서 사용하도록 처리한 것입니다.

3차원을 2차원으로 줄이기 위해 Z 값을 0.0f 설정했구요.

참고로 ray boundingbox 충돌의 결과는 거리가 나오는 데요.

충돌을 하지 않을 경우에는 null 나오고, 충돌을 하면 충돌된 거리가 나옵니다.


충돌된 거리가 직선의 길이보다 작아야 충돌로 인지하게 처리하면 끝이 납니다.


(3) 선과

 - 원의 중점Pc 에서 (P1->P2) 수직하는 (최단거리) 만든다선과 수선이 만나는 교점이 선의 범위 안에 있으면 충돌

   P = P1 + u(P2 - P1) -> P 교점이라 하면, (Pc - P) dot (P2 - P1) = 0(내적이 0이면 직각)

   식을 풀면 u = (Pc - P1) dot (P2 - P1) / (P2 - P1) dot (P2 - P1)

   u < 0이면, P1 원의 중점으로부터 최단 거리(u == 0 이면 P1 수직인 좌표)

   u > 1이면, P2 원의 중점으로부터 최단 거리(u == 1 이면 P2 수직인 좌표)

   u값을 처음의 식에 대입하면, 교점 P 나옴

   교점 P에서 원의 중점까지의 거리가 원의 반지름보다 작으면 충돌


(4) 사각형과 사각형

 - 사각형을 R1 R2라고 했을때, R1 네점이 R2 포함되는지, R2 네점이 R1 포함되는지 검사.

   하나라도 포함되면, 충돌


(5) 사각형과

 - 원의 중점에서 사각형의 꼭지점에 대한 거리가, 원의 반지름보다 작거나 같은 점이 하나라도 있으면 충돌


(6) 원과

 - 원의 중점간의 거리가 원의 반지름의 합보다 작거나 같으면 충돌.


직선의 교차점을 구하는 알고리즘

글은 선분의 교차점을 구하는 알고리즘이 작업에 필요해서 작성해둔 글이다. 참고로, 예전에 두선분의 교차점을 구하는 자체가 쉬울 것으로 생각하고 흔히 생각하는 기울기, y 절편을 이용하여 접근하려고 하였다. 이는 상당히 비효율적 방법이였고 조금 효율적인 방법으로 접근하였다


먼저 직선의 방정식으로써, 기울기와 절편으로 나타내지 말고, t 매개변수를 이용해 나타내면 다음과 같다. 

P1 P2 직선의 시작점과 끝점을 나타내며, t 범위는 0에서 1까지이다. (P1, P2에서 1, 2 아래첨자로 생각하기 바란다)

선의 식을 알았으니, 이제 두선의 교점을 구해보는 것으로 응용해보자. 먼저 아래 그림을 보자.


Line1 P1 P2 이루어져 있으며, Line2 P3 P4 이루어져 있다. 두개의 라인을 식으로 표현해보면 다음과 같다.


이미 알겠지만, t s 0에서 1부터의 값이며, 두선의 교점은 두선의 공통된 값이므로 P(t) P(s) 같으므로 위의 2개의 식은 아래의 1개의 식으로 나타낼 있다.

 ( 1 - t ) P1 + tP2 = ( 1 - s ) P3 + sP4


다시 위의 식을 x, y 분리해보면 아래와 같은 두개의 식들로 분리된다.


x로 분리  

P1 = x1; P2 = x2; P3 = x3; P4 = x4;


(1-t)x1 + tx2 = (1-s)x3 + sx4

x1 - tx1 + tx2 = x3 -sx3 + sx4

x1 + t (x1 + x2) = x3 + s (x4 - x3)


y로 분리 

P1=y1; P2 = y2; P3=y3; P4=y4;

y1 + t (y1 + y2) = y3 + s (y4 - y3)


위의 식을 t s 대해서 정리를 해보면 다음과 같다.


, 위의 t s 두선이 서로 만날때의 값이므로, 최종적으로 두선의 교점은 다음과 같이 나타낼 있다.

위의 x, y 우리가 구하고자하는 직선의 교점이다

마지막으로 t s 대해 정리해 보도록 하자.


s
t 값이 0 1 사이를 벗어나는 경우, 선은 교차하지 않는다고 판정해야 한다. 그리고 s t 구하는 공식에서 분모가 0 경우 선은 평행하다는 의미이므로 교점은 존재하지 않다. 분모와 분자 모두 0 경우 선은 동일한 선이다.


아래의 코드는 위의 설명을 토대로 작성하였다.

bool checkCross(const CPoint& AP1, const CPoint& AP2, const CPoint& BP1, const CPoint& BP2, CPoint* IP)

{
    double t;

    double s; 

    double under = (BP2.y-BP1.y)*(AP2.x-AP1.x)-(BP2.x-BP1.x)*(AP2.y-AP1.y);

    if(under==0) return false;

    double _t = (BP2.x-BP1.x)*(AP1.y-BP1.y) - (BP2.y-BP1.y)*(AP1.x-BP1.x);

    double _s = (AP2.x-AP1.x)*(AP1.y-BP1.y) - (AP2.y-AP1.y)*(AP1.x-BP1.x); 

    t = _t/under;

    s = _s/under; 


    if(t<0.0 || t>1.0 || s<0.0 || s>1.0) return false;

    if(_t==0 && _s==0) return false; 


    IP->x = AP1.x + t * (double)(AP2.x-AP1.x);

    IP->y = AP1.y + t * (double)(AP2.y-AP1.y);

    return true;
}


2020/12/15 - [iOS/Tips] - 디버깅 차단 처리 (Anti Debug)

2020/12/14 - [iOS/Tips] - bundle id 알아내기

2020/12/12 - [AI/Algorithm] - 2D 충돌처리

2020/12/11 - [iOS/Swift] - UIViewController 스위칭

2020/12/11 - [개발노트] - PlantUML 설치 (Mac OS X)

2020/12/11 - [개발노트] - 특수문자 발음

2020/12/10 - [iOS/Objective-C] - 웹뷰에서 javascript 함수 동기식 호출

2020/12/10 - [iOS/Tips] - Fat Static Library 빌드 (2/2)

2020/12/10 - [iOS/Tips] - Fat Static Library 빌드 (1/2)

2020/12/10 - [iOS/Tips] - Custom UserAgent 설정

2020/12/10 - [iOS/Tips] - CocoaPods 설치 및 제거

2020/12/10 - [iOS/Tips] - Clang diagnostic 경고 무시하기

2020/12/10 - [개발노트] - Bluetooth UUID

2020/12/08 - [개발노트] - 모바일 앱 메모리덤프 이슈 해결방법

2020/12/08 - [프로그래밍/Java Script] - Android, iOS 앱 설치여부 체크 및 스토어 이동


반응형

'개발 > AI,ML,ALGORITHM' 카테고리의 다른 글

MNIST 데이터셋 다운로드  (0) 2023.07.19
Neural Network (XOR)  (0) 2022.11.18
Generic algorithm  (0) 2020.05.19
neural network  (0) 2020.05.19
minimax full search example  (0) 2020.05.19
블로그 이미지

SKY STORY

,